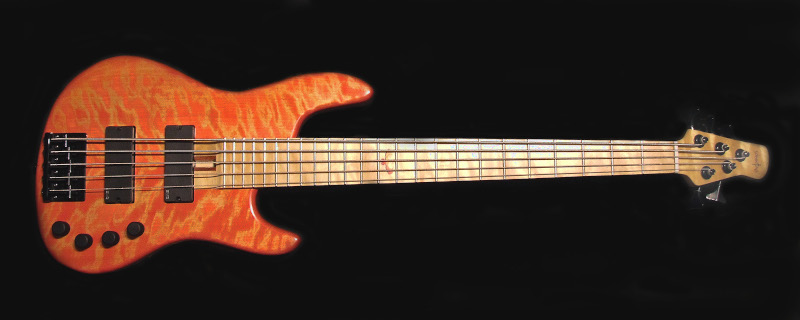
The Fenix
A piece of ancient greek folklore

One of the most popular and classic models of electric basses is the world famous Fender Jazz Bass, a close second in popularity to the Fender Precision Bass. First introduced in 1960, in these days it might be the most popular electric bass model.
Want to know more? Read all about it here;The story of the Jazz Bass
So starting thinking about my next build I came across the idea of me making my own version of the Jazz Bass. Not a copy, though, but a combination between my own body shape that I've used for the "Silver surfer", "Heavy Metal" (etc.) and a standard Jazz Bass body shape. The headstock shape was too made "something in between".I decided to make the body out of alder, for that classic sound, with some nicely figured birch on the front and back. The neck sides (the bulk of the construction) was made of birch, with thin stripes of wenge on both sides of the maple core. The fingerboard was too made of figured birch.I've never really been a big fan of the pickguards and control plates of the Jazz Bass, so I decided to ditch those all together and make it look more "clean" on the front.
Time to lay down some specs;| Construction: 5-string
(bolt-on) Scale Length: 810mm (32") Strings: Kerly Music 45-130 Number of frets: 24 Tuners: Boston (Black) Bridge: Gotoh style (Black) Frets: Dunlop 6310 |
Neck wood: Birch, maple,
wenge (5-piece) Body wood: Alder (2-piece) with figured book-matched birch front and back Fretboard wood: Birch (figured) Pickups: EMG DC40 (active) Preamp: EMG BTS System |

Since the front and back of the body was nicely figured I wanted to try doing something I've never really done before, staining the body in two different colors. The idea of this technique is to first apply a coat of one dye, let it dry, sand it back to a certain degree, and then apply a second dye of a different color on top of that. This way the two colors will soak into the grain of the wood differently and thus make a nice looking effect. So I decided to use yellow and red, trying to get a "burning flame" effect. First the yellow dye was applied, then sanded back and on top of that the red dye, which I also sanded back a bit to get it a bit more lighter.


Want to know more about how this is done? Check out this Youtube video by BigDGuitars;
Fireglow burst on a Quilted Maple top.
The edges of the body i dyed a bit more darker red to get some more contrast and a bit of a classic sunburst effect. About ten coats of clear acrylic lacquer was left to dry for about a week, then wet sanded, buffed, polished and waxed.Here's a sound sample. Both pickups full on (blend pot in the middle) bass and treble at 12 o'clock.


we learn by doing, and falling over"
- Richard Branson
